Wednesday, March 14, 2012

Cute Clothespin Decorations

Mommy and Kiddie Craft :)

I think for every few crafts I post there will have to be a mommy and kiddie craft since my 9 and 4 year old love to craft as well.  Tonight my little helper was my 4 year old girl, Keilani.  We are making cute little clothespins that can be used for many different purposes.  To use on a fridge as a note or photo holder glue a magnet to the back.  You can also loop a ribbon to the back to hang on the wall in the kiddies room for photos or their art work.  I recommend using a glue gun that is cool to the touch.  I have burnt off alot of skin from my hot glue gun when my kids got to anxious or were running around with the puppy and let me tell you it is not fun at all!!!! Here we go....

Materials:

Clothespins
Acrylic Paint
Paint Brush (smaller work best for details,
one medium for all over color)
Waxpaper or newspaper
Ribbon
Beads, gems or other embellishments
Glue Gun
Glue Sticks
Skewers (sticks)

Start by having your child paint the entire clothespin...


As pictured below, I used the skewers(stick) to hold down the clothespin once it had alot of paint on it (keeps things a little bit cleaner).  I also used them while my daughter was adding her design.  She chose to do polka dots in three different colors.  When doing dots you can either use the opposite side of the paint brush or the flat end of the skewer.  Make sure to do a test dot on waxpaper just in case there is too much paint on the stick. (kids tend to go crazy on the dipping :P)


While waiting for the design to dry cut about a 4-5 inch ribbon....if you would like a second color cut the same length and glue the ends to the bottom ribbon.


Fold the ends to the back and glue together.  The smaller the circle the smaller the bow will be.


Pinch the center of the ribbon together to shape the bow seen below.  Secure it by gluing and wrapping a skinnier ribbon aroung it a few times to hold it in place.  Embellish the bow with a gem, pearl etc. Than once you have done that glue the bow to the top of the clothespin.


Custom Covers for Light Switches and Outlets

Bored with the same old pain white covers in your room? Add some spice to a room with custom covers! So cute and totally easy. Materials needed are modge podge, hot glue gun, glue sticks, paint brush, sharp pointed scissors or exacto knife,clothespins, wax paper, pen and the scrapbook page for the design you would like ( the large sheets work for about 5 covers)

The first thing you are going to do is cut out the scrapbook paper with enough room to bend over to the back of the plate cover.  More is always better so when in doubt leave extra.  Once you have done that turn your cover over on your cut scrapbook paper on the non design side.  Take a pen and trace out the opening.  *The tutorial will have photos of both the light switch cover and the outlet cover


Take the paper and fold in the center of your tracing and make a slit.  Once you have made the slit in both areas cut out the center along the line you traced.


Try and cut out as close to the line as possible.


Add a layer of modge podge with a paint brush to the top of the cover plate and lay face down on the backside of the paper.  Make sure that the openings are lined up so you are not left with cover showing through the front side.   Add clothespins to hold paper in place until it is fully dry


Smooth edges with your fingers on both outside and inside.


 Add hot glue to the edges of the cover one side at a time.  Fold paper over to the back of cover and smooth again while hot glue dries. Be sure to do this quickly as the hot glue can leave it bumpy.  Also make sure not to add to much glue because when you smooth it over some may come out and burn your finger.


Cut extra paper of corner of cover so it doesn't bulk up when folding over the other side. Repeat prior step until all four sides are glued down


Poke a small hole where the screw will be going before you start the next step or it will mess up the finish on it.  Lay your cover on a sheet of wax paper.  Take a paint brush and add a layer of modge podge.  After it dries add another coat.  Make sure to get the sides and insides of the plate.


After the modge podge dries you will have a finished cover with a sealant on your new designer piece to your room :)


Why Buy New Furniture, Repurpose What You Have

My daughter decided she wanted her room completely redone....and of course any opportunity I have to change or update something I am all over it. I let her choose her room color which ended up being Hot Pink. Then I told her to pick one thing from Hobby Lobby and we would design her room based on that. As hard as it was for her to pick ONLY one thing (she loves Hobby Lobby as much as I do) she went with a black metal horse drawn carriage wall hanging coat hanger. Nice taste for a 4 year old :) She has a ton of stuffed animals and little Hello Kitties and I really wanted her to have a place for them. So I found short bookcase shelf that I had in my office and thought this would be perfect only if it was black. We decided to save money and not buy something new. Instead we changed the color. We got a can of primer (depending on the size of your project the can size will vary) sand paper, paint brush, small paint roller, can of desired paint color and I used an acrylic paint sealer to finish it.

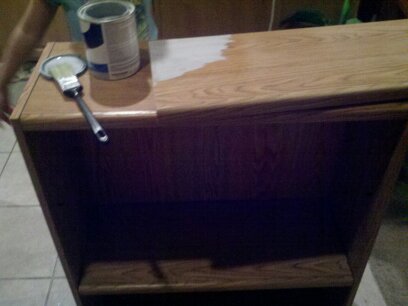
 First thing to do is use sand paper to remove the smooth surface but not enough to take off laminate or you will have uneven paint.  Just enough for it to be dull.  Take a towel and wipe it down to remove any dust from sanding.  (lol my daughter is in the background trying to be apart of the picture...she is so silly <3)


Using a paint brush paint two coats of primer making sure to get any drips or runny primer.  If you happen to notice it later than remove with a razor blade and re primer. Make sure to remove shelves before priming.  I let the primer sit for 24 hours each coat to let it cure.  This way it wouldnt scratch of to easily.   Then I used the small paint roller and added two coats of color.  The roller helps give it a thick layer and covers better.  If you want more of a wash look or vintage than you would use a paint brush.  Try to be careful when painting over the peg holes.  Too much paint will make it hard to insert peg or even at all.

After the paint set I used Acrylic Paint laqucer (already had it at home) and sprayed the shelf outside and it dries quickly.  The smell is strong so be sure to let it air out before you add items to it. When putting shelves back in you may scratch the shelf, if this happens do a quick touch up. Below is our finished product and we were very happy with it.  It offered alot of space and fit perfect in her room :)